
Michael Keropian Sculpture LLC
Rubber Blanket Molds
RUBBER MOLDS are generally made to reproduce a sculpture in some other material. Example: A wax for the casting of a bronze (Lost Wax Process), or some other material like plaster or resin. Rubber molds provide a flexibilty that allows us to capture details of a sculpture or an object that may be difficult to mold in plaster. For mold making in plaster see: Waste-molds or Piece- molds.
There are many types of rubbers; Latex, polysulfides, urethanes, and silicones to name the most common. The type of rubber one chooses is dependent on what original material one is molding, and what material will be cast from the mold. So you must do your research. I will try to demonstrate with the photos below, how a rubbermold can be made. There are several approaches to making rubbermolds. You can paint, pour or create a parting-line (pour one side then pour the other side). For the demonstration below I have chosen the latter version, since it gives you the sharpest parting-line or finest seam and the best rubber to rubber registration. Please remember this tutorial is only explaining the basic process. I look forward to any questions or suggestions.
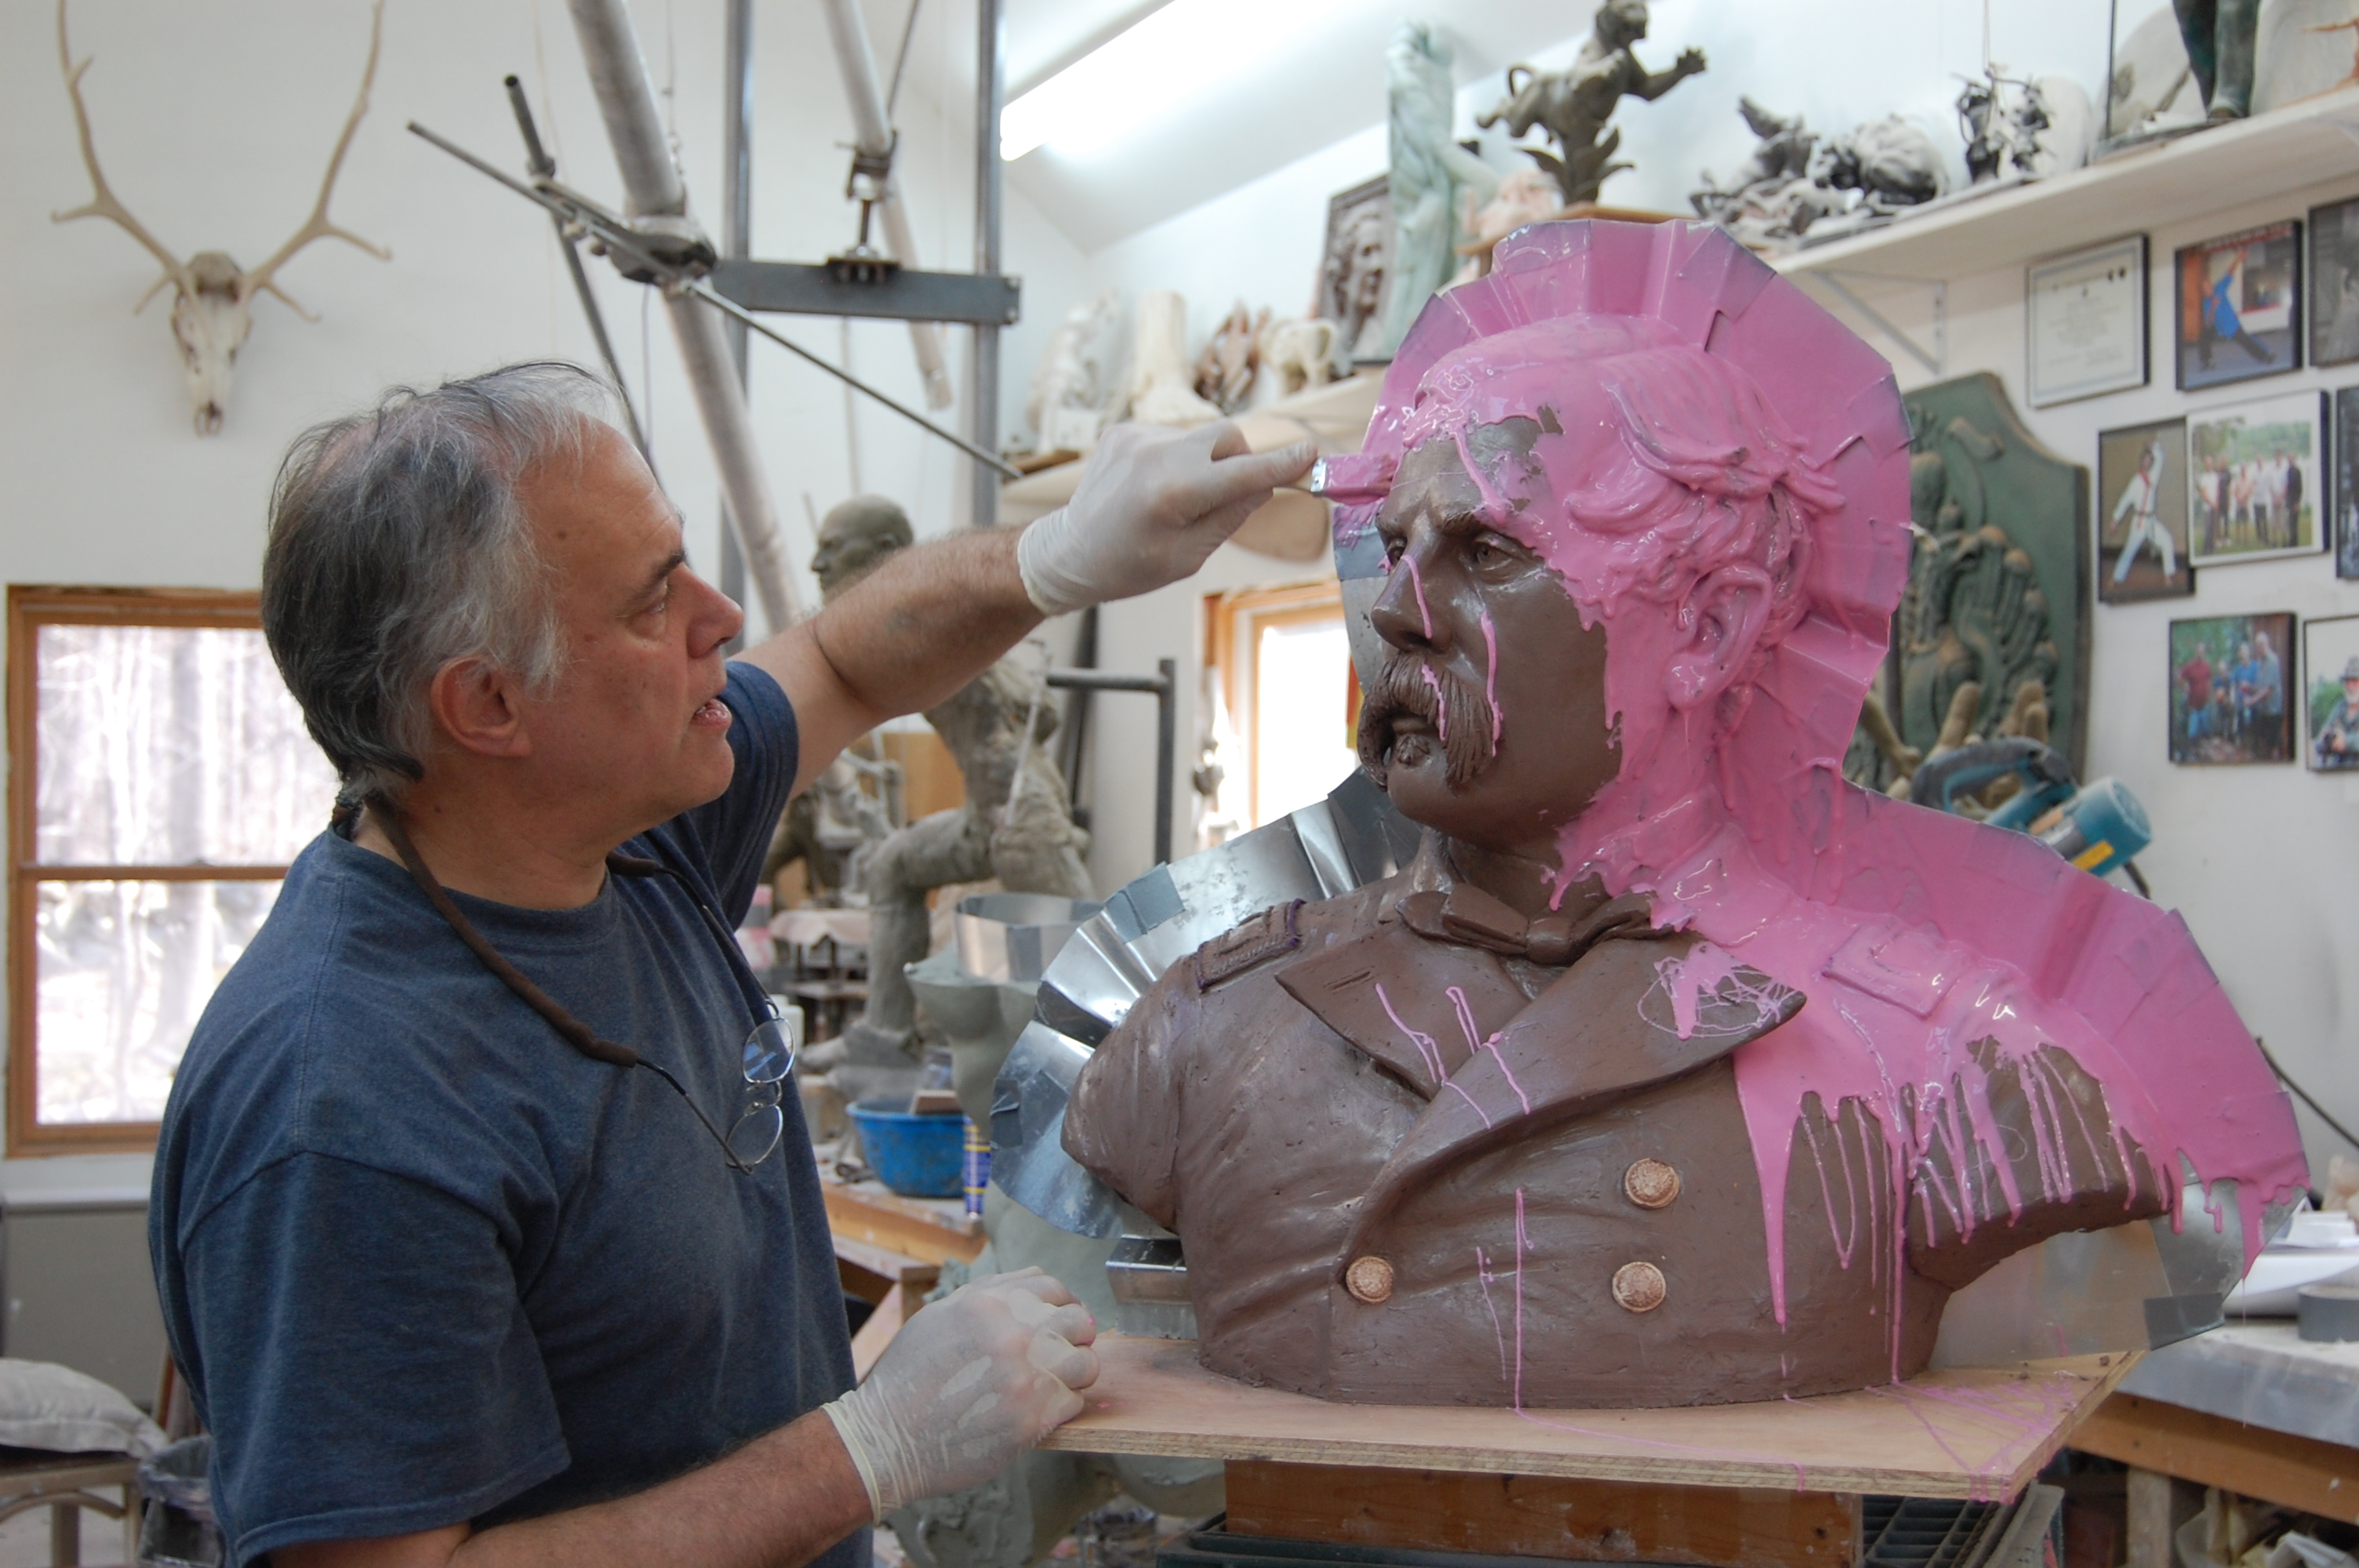
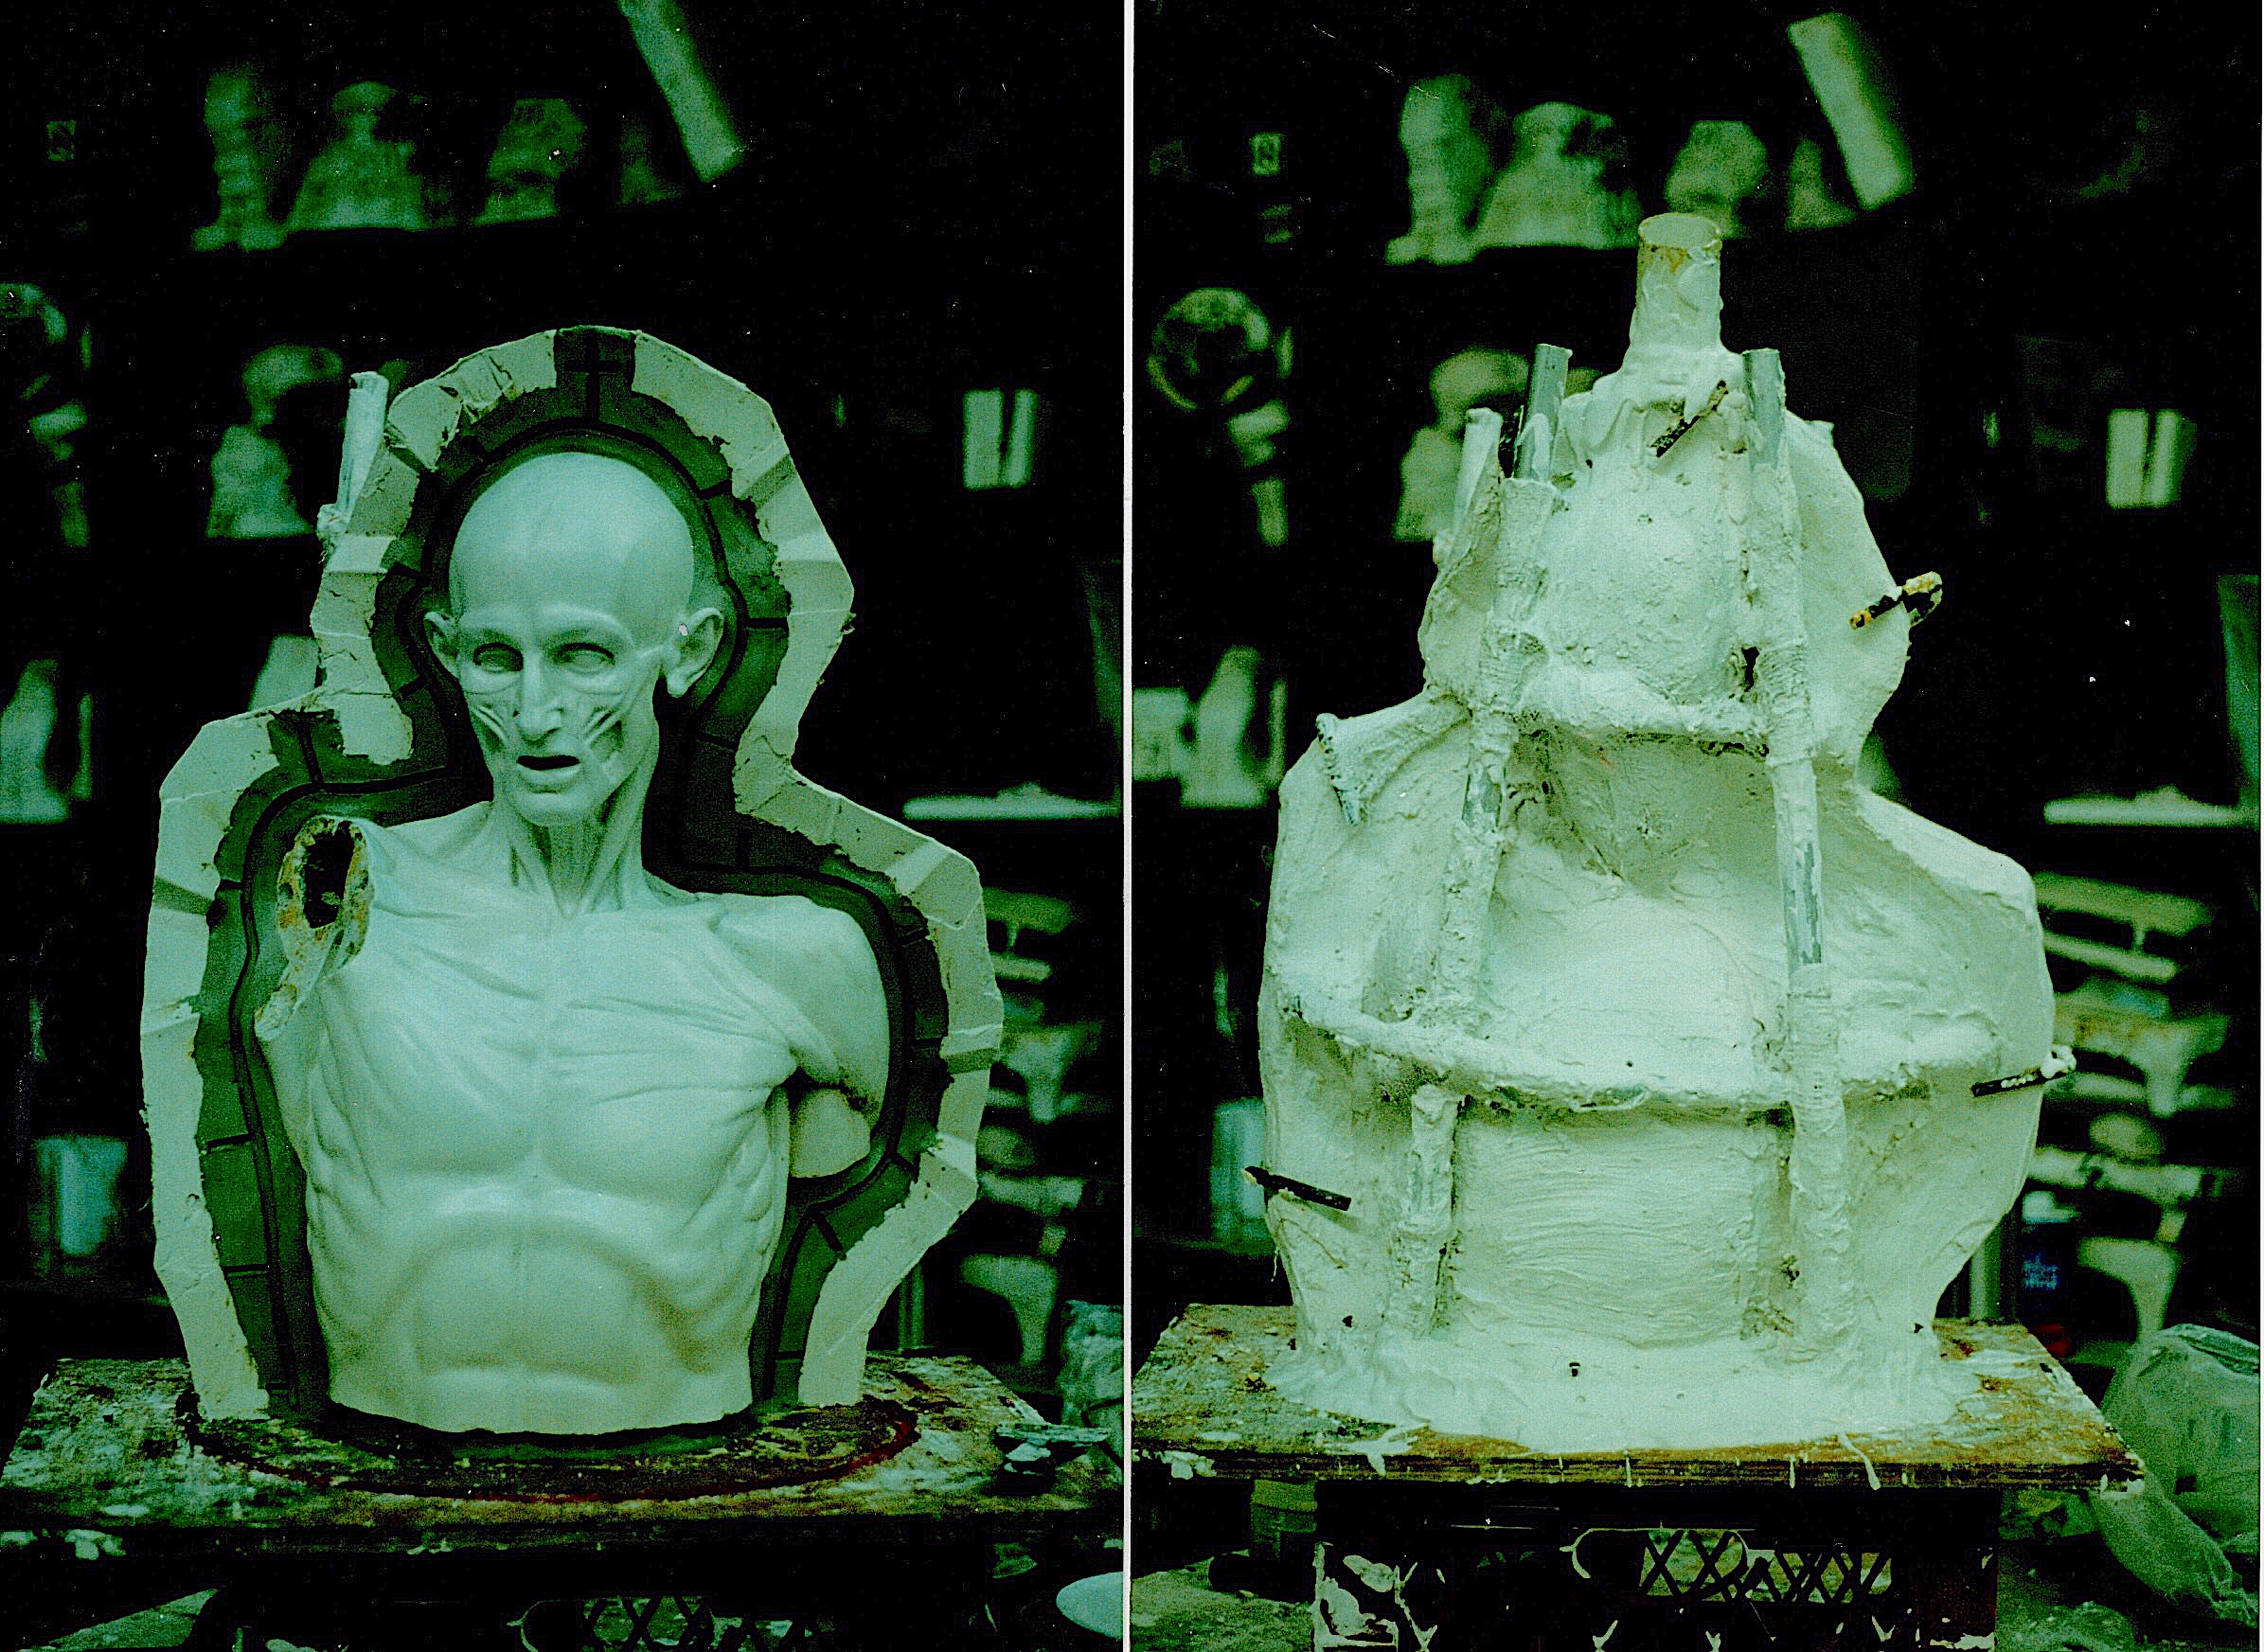
First it is important to properly mount the sculpture to be molded. Use paste wax or other separator specific for the material being molded as well as the rubber being used. The separator you used depends on the rubber being used and the sculpture being molded. The orginial sculpture will be wrapped with plastic wrap in the case of a plaster or hard surfaced material. if it is clay damp wet towels can be placed on the sculpture first and then wrapped lightly with plastic wrap. In this rubbermold process the plaster mother mold shells or sections will be produced first, then the rubber will be poured into the space between the shells and the original sculpture. In order to create these mothermold shells which will eventually support the rubber, we need to cover the sculpture with a clay blanket. The clay blanket consists of a thickness of about 1/4" clay slabs. This thickness will eventually be the exact rubber thickness. This thickness can be varied of course depending on the viscosity of the rubber being used.The second picture above shows the sculpture covered with the clay blanket. Also you will notice a clay key that follows along the parting line. The parting line is the location of the division of the mold sections. In this case the mold will have two ruber sections and two plaster mother mold sections. A key is added along the edge as well as a clay key on the bottom. These keys will allow the rubber to be keyed into its mother mold. A round ball or button can be used on wider expanses of rubber and will also key into the mothermold sections. A pour spout is added in the right shoulder as well as the top. Because we are pouring rubber into the mold the two pour spouts allow additional access to do this. I have also added metal flashing or "shim" that will keep the two plaster sections from bonding.
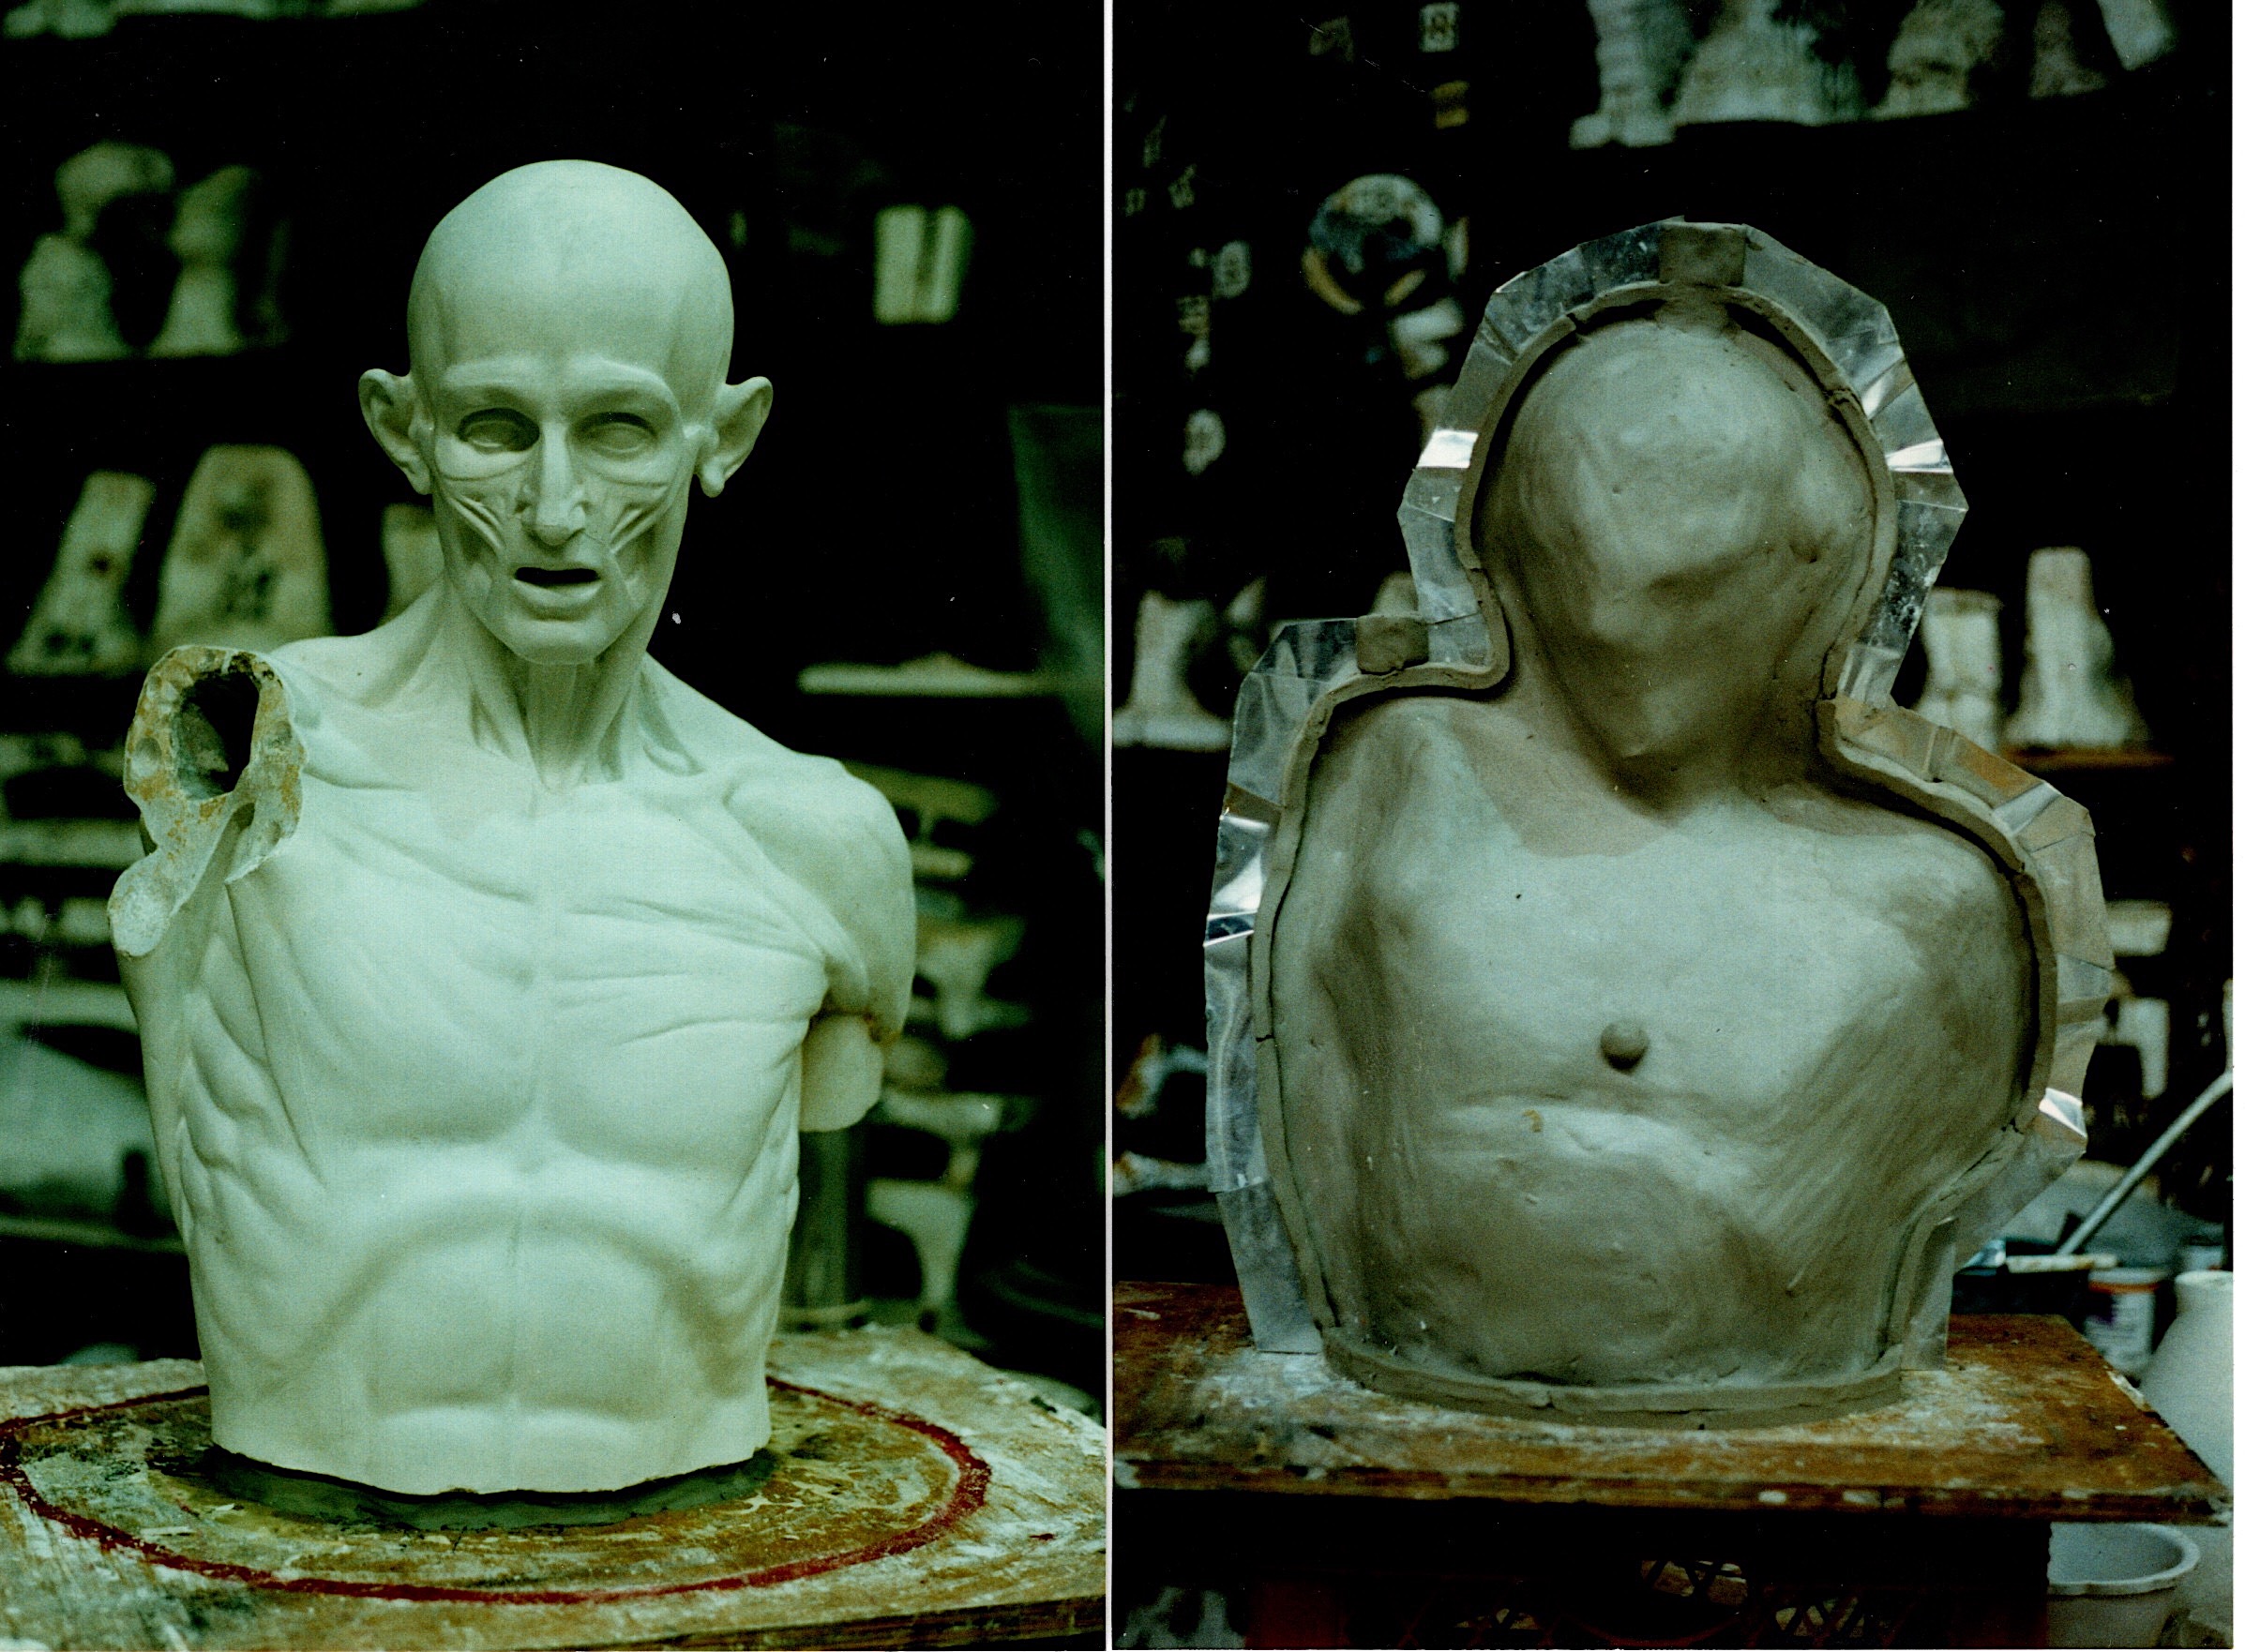
Once the clay blanket and shims are attached to the clay we can make our mother molds. Mix up a bowl of plaster enough to cover all the clay (called a "splash" coat) and the shim as seen in the picture on the left. You can cover both sides with plaster at the same time or just make one plaster shell at a time. Once the plaster begins set up we will apply a double layer of burlap and plaster. On the edges I will build up with four layers of burlap. After this is done I will add conduit or piping for support as seen in the picture on the above right. Also build up the edge along the shim line . This will help to clamp the mold together later. Once both plaster mother mold sections are completed make sure to scrape the shim between the two shells.
Once the plaster has set, gently remove one side of the plaster from the other. Since we will be pouring rubber into one side at a time be careful not to move the other mold section or the clay from that side, or the original sculpture inside. Take the plastic off this side of the sculpture and clean if needed. Remove the clay from the plaster shell just removed. Clean out the shell. On the other side create a parting line on the clay. Make sure the clay all along the parting line is flat and perpendicular to the sculptures surface. Ideally it should be on the same plane as the plaster edge. You can use a small brush and some water to clean the parting line. You can now add a groove along this surface using a loop wire tool. This will create a key for ruber to ruber registration when the mold is closed.
Make sure there is no residue of clay on the surface of the sculpture. Once the plaster shell is clean, a coating of paste wax or other recommended separator can be applied thoroughly to keys and inside surface of the mold. If the back shell and sculpture has not moved you can reattach the mother mold section and clamp it together. You should have a even sperations between the inside of the plaster shell and the surface of the sculpture. In some cases before I reattach the shell, I mix up some rubber and paint the surface of the sculpture, then close the mold shell and clamp together. You must clamp or secure the mold shell to the table as well. I go along the parting line edge with some plaster to prevent any rubber from seeping out from the parting line during the pour. I add a pvc pour spout to the two holes in the mold line and also secure them with plaster. I then mix up some rubber and begin pouring the mold. Once it comes to the top I may tilt the mold to allow and air trapped in the mold to come out. If you are using two pour spouts use the lower one first then cork it up and continue to pour into the top spout.
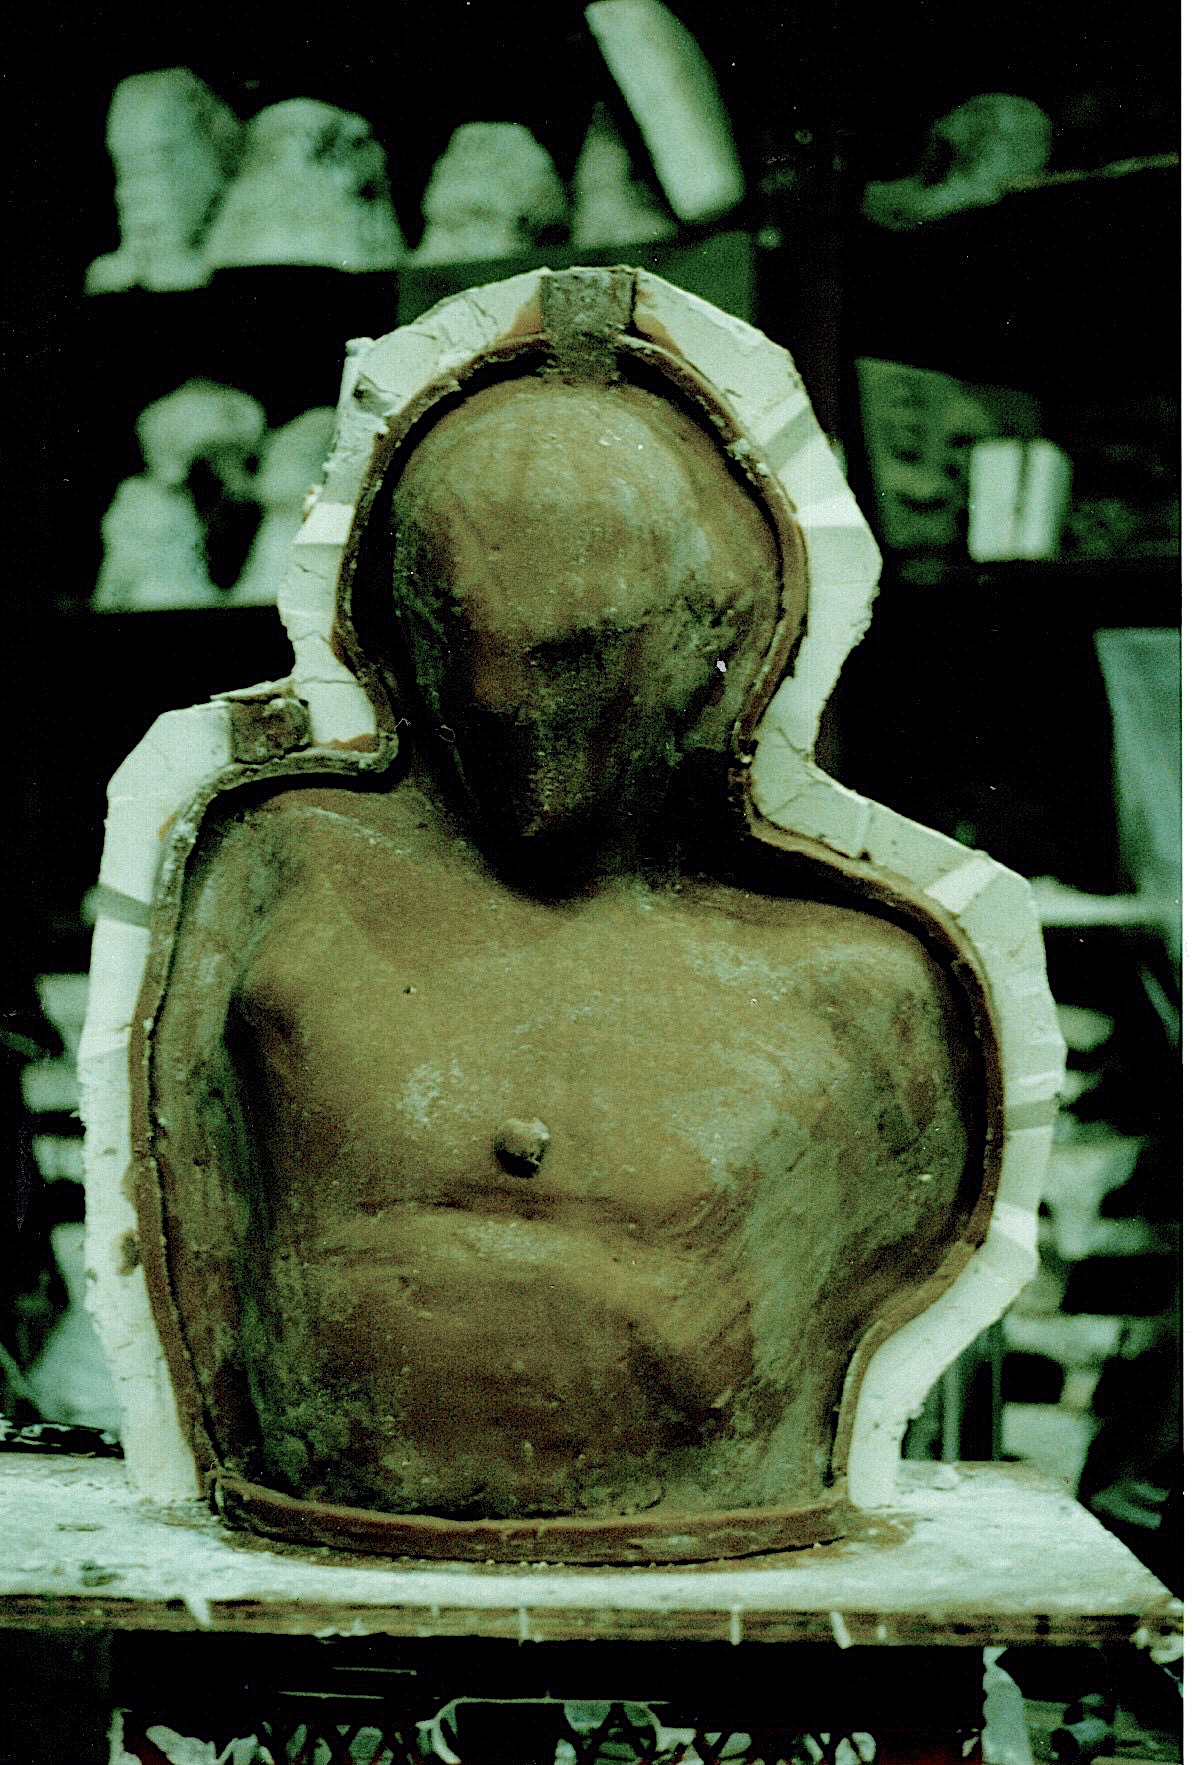
Once the rubber has cured (see rubber instructions) the other mother mold can be removed again being very careful not to disrupt the other side of the mold or the sculpture inside. Follow the proceedure above for cleaning the mother mold. Remove all the clay from the other parting line (now rubber) and add a separator to the rubber like lacquer or other recommended separator for the rubber. Close the shell as before and pour the other side. This picture shows one shell removed exposing the cured rubber. Once bother shells are removed. You can peel back the rubbers and place them into their mother molds. Trim any rubber flashing so the rubber sits into the shells properly. Feel free to check out my other tutorials about mold making and casting.
Michael Keropian
Keropian Sculpture LLC
392 Gipsy Trail Rd
Carmel, New York 10512
845-282-3360 Cell
MichaelKeropian@gmail.com
http://www.KeropianSculpture.com
Entire website contents, artworks and sculpture Copyright © 2022 Michael Keropian Sculpture
All rights reserved. No part of this website or artworks may be reproduced in any means without prior written permission.